"The best things in life are nearest: Breath in your nostrils, light in your eyes, flowers at your feet, duties at your hand, the path of right just before you. Then do not grasp at the stars, but do life's plain, common work as it comes, certain that daily duties and daily bread are the sweetest things in life"
Robert Louis Stevenson
Showing posts with label easy. Show all posts

March 16, 2015

Wonderfully Golden Crunchy & Crispy Homemade French Fries (from scratch)

Homemade french fries from scratch (with mayonaise)


I love french fries! and when I was living in Belgium I was able to get fries often in the many Friteries all around town. But since moving back, getting fries means going to Mc Donalds, Burger King or buying oven fries at one of the grocery stores.  I am not a really picky eater so I can eat all this fries, but there is nothing better than actual fries made from scratch.  

So, I ventured to make my own fries after calling my mom as she used to make them for us when I was growing up.   After a very simple few steps, I ended up with these amazing fries! seriously they were really delicious. 

Ingredients:                                                          
-Potatoes (I like gold potatoes)         
-Vegetable oil                                                         
-Salt                       
-Water
-Mayonaise, Ketchup, any other sauce

Homemade french fries from scratch (with mayonaise)
Ingredients

How to:
1. Pour oil in a small pan (fill about about half the pan) and heat in medium high heat.
2. Cut all potatoes into long strips
3. Submerge them in water with lots of salt for 20 minutes
3.  Dry the potatoes with kitchen paper towels.  (very important, because otherwise the fries will absorb the oil and end up soggy instead of crispy and crunchy.)
4.  Lay small batches of potatoes in oil and fry until golden, about 10 minutes each batch.
5.  Add salt to the fries as soon as you take them out of the pan so that the oil help the salt to stick to them.
6.  Enjoy the fries with mayonaise

salt water and french fries
Submerge potatoes slices in salted water
drying french fries
Dry potatoes thorougly

Homemade french fries from scratch (with mayonaise)
I love to eat them with Mayo instead of ketchup!


January 24, 2015

Doodling on Glass Canisters a quick and easy DIY

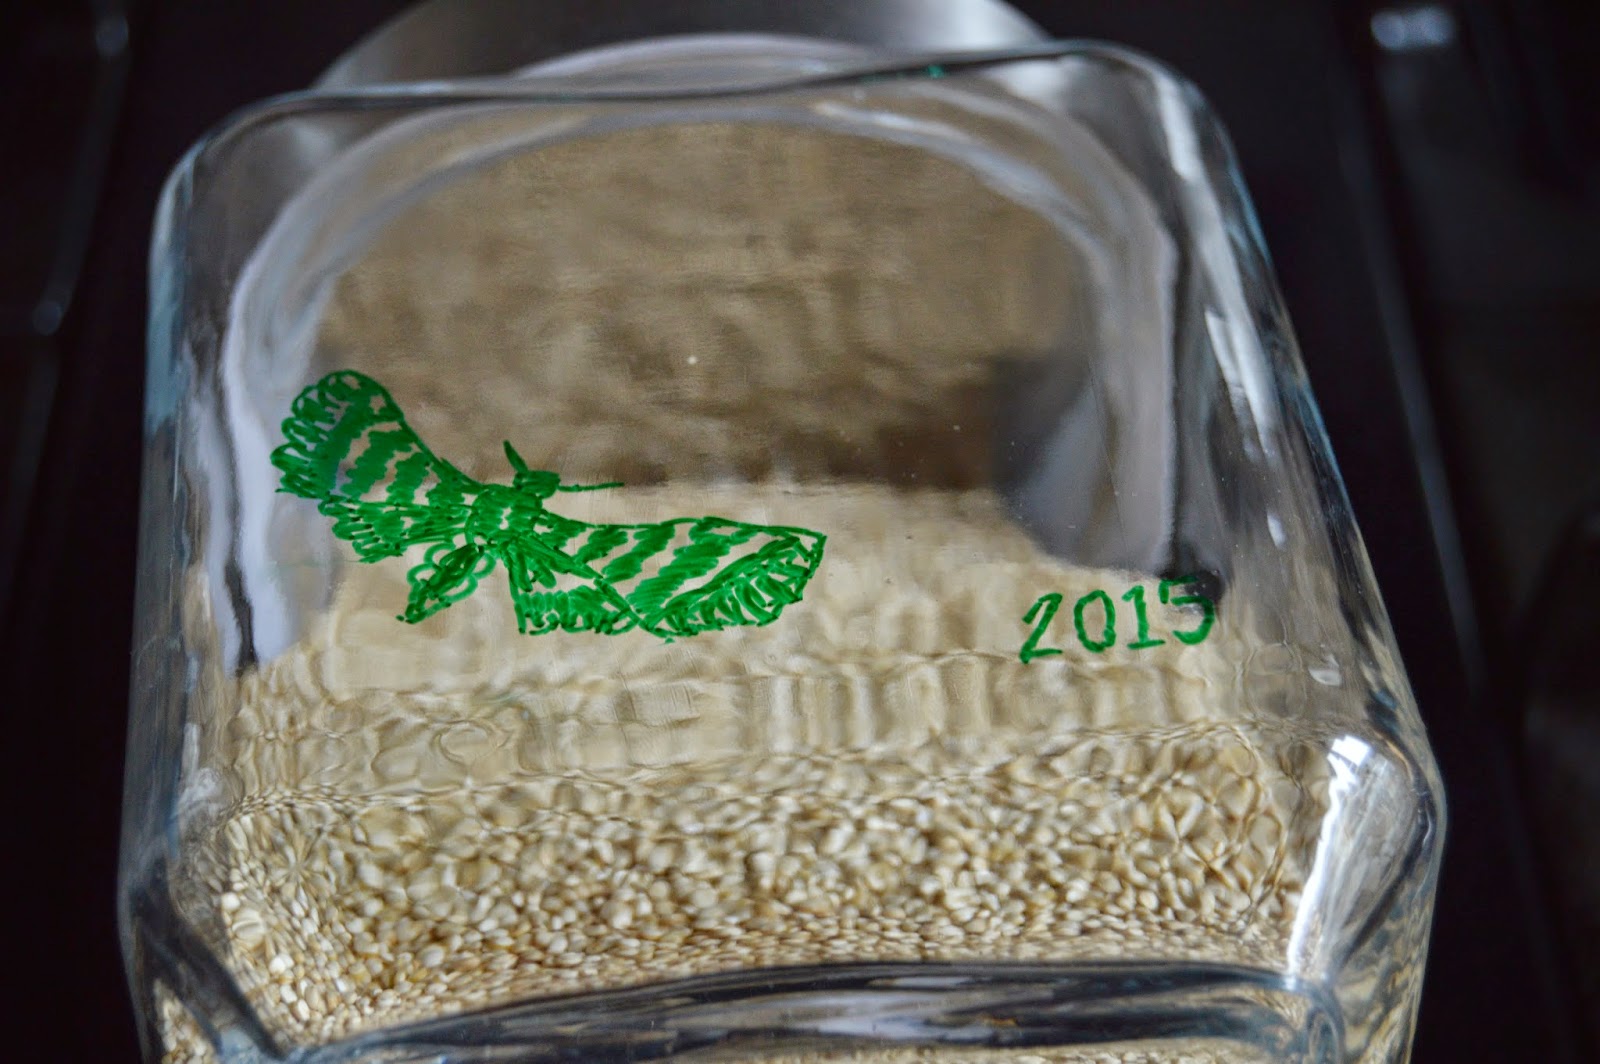
DIY glass canister moth motive


One morning, back in October last year, I opened my pantry and a moth flew out.  I thought it strange, but didn't worry about it until a few days later, when I was killing time reading my local discussion forum and one of the titles read: "help: pantry moth infestation."  P A N I C! Did I have an infestation I did not know about?....It turns out I didn't, but I did google "pantry month" and realized that moths could enter your pantry, feed on anything that is not fully and properly sealed, lay eggs and create and infestation pretty quick.  Also, this apparently is a result of very warm summers and leaving back doors open.  So basically my open oatmeal or flour packages were a moth feast just waiting to happen.

Needless to say I went on a pantry cleaning spree, taking everything out and throwing out every opened box.  I guess the moth I found had probably just entered the pantry and I caught it just in time.  But in any case I got enough glass containers to put all of my pantry staples to avoid any chances with infestations.

The glass canisters were  just plain, transparent glass with silver colored lids.  They looked good enough for a simple pantry glass container, but I thought it would be an added benefit to "beautify" them into differentiation (flour or powdered sugar?) so I took a fine tip over-projector marker and started doodling.  It literally took me all of 5 minutes, and it brought me back to my high school days when I spent lots of time doodling in the back of my notebooks.

My idea of beautifying the plain canisters .......a moth. 
Simple, efficient, and DIY were you can put your personal stamp on!


And by the way, when you want to change the content of the glass canisters, just clean the doodles with water or rubbing alcohol
glass storage diy


Moth pantry glass container DIY


October 12, 2012

Tortilla Chips: Easy and Quick Tutorial


Simple DIY Tortilla chips


A few nights ago I made burritos for dinner.  Personally, I think burritos can be healthy if made in house and using the right ingredients.  I always use beef and beans as main ingredients, tomatoes and lettuce as fillers and guacamole as a spread.  Of course there are a lot more ingredients you could add to make it taste even better (cream cheese, rice, sour cream, cheddar cheese, etc) but I try to stay away from those unless there is a special occassion.   In any case, as we are a family of 4 and 2 under the age of 3, we never finish a tortilla package (there are usually 6 to 8 tortillas in a package) and the leftover is usually left in the fridge with the good intention of eating it next day as a wrap of some sorts, but it never really happens and I always end up throwing the leftover tortillas away.  However, this week, I was really set in the "do not throw away leftover tortilla" mood and so I decided to make tortilla chips (tostito style). 
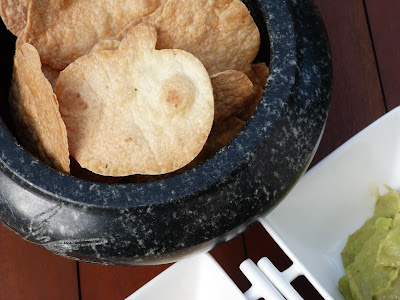
It is really simple, basically cut the tortillas with a knife or with cookie cutters (I thought this would make it more fun for the kids), brush olive oil on both sides of the chips, add salt and other spices if you like ( I added pasta & pizza spicy spices to some of the chips, but chili or oregano or italian herbs would also probably taste delicious).  Put in the oven 150C (300F) and bake until golden and crisp.  Around 30 minutes (it could be less so check often).
I served the tortilla chips with the leftover guacamole and hummus.  We all loved it and the best of all is that there were no leftovers.
Before baking
After 30 minute baking


October 01, 2012

Mustard Sauce Recipe

quick mustard sauce recipe

Making dinner that is tasty, easy and fast is a daily struggle when 5:00pm hits (except for weekends when my husband cooks).  Friday evening was not that much different.  I looked into my fridge and decided on making chicken nuggets with honey mustard sauce.  I was set on the idea,
I had cut the chicken, covered it with bread crumbs and italian herbs, put the tray with the nuggets in the oven and when I was about to start with the sauce, I realized I was out of honey.  My head started coming up with all sort of different "solutions" like adding brown sugar, cane sugar, or even soya sauce instead but I wasn't sold on any of the alternatives.  I then searched my pantry and found sugar molasses, (which are quite common in Belgium and used as a syrup for pancakes) and used that to make a sweet mustard sauce instead.  I am sure you can find the molasses in the same isle were maple syrup is found. 

Getting back to the sweet mustard sauce...all my family loved it (see the simple and quick recipe below).  We used it not only for the nuggets but also for the boiled potatoes and the fresh cucumber.  Its tanginess worked great with all of Friday's dinner different elements.  I really like the versatility of this sauce,  I am certain it can be used with baked chicken, BBQ chicken, salmon fillets, fresh tomatoes and surely celery fans will appreciate it as a delicious alternative to Ranch dressing.  Just be careful not to eat it too much of it as the mayonnaise in it makes the sauce high in calories.  (You can always replace it with plain yogurt or low fat mayo though.)  Enjoy!


 Ingredients:                                                                                                                                                  -1/2 cup Mayonaisse
-1 tbsp Mustard
-1/2 tbsp Red Wine Vinegar
-2 1/2 tbsp Sugar Molasses
 Preparation:  Just mix all ingredients together (serves 4)


Voila! 

September 25, 2012

Organizing re-usable Plastic Bags

Plastic bag folding; Origami
In Europe (at least most of Western Europe) free bags are not available for grocery shopping.  About 6 or 7 years ago,  grocery stores stopped providing free plastic bags for packing groceries and started offering either large strong plastic bags for a fee or encouraging totes in an effort to cut the amount of plastic bags ending in landfills and boosting the re-use of purchased plastic bags. 

Before plastic bags had to be purchased, I used  to use the free bags on the bathroom trashcans, which was my own way of re-using so I never had many bags laying around.  After the grocery chains changed their approach to free bags I adapted myself by purchasing the sturdy plastic bags about once per year.  The negative side is that I have too many bags now laying around and taking space.   So I decided it was time to learn to fold them and keep them organized to take back some much needed space.

To fold the large bags, I used a simple method I found on Origami Spirit blog (http://www.origamispirit.com/2012/01/how-to-fold-plastic-bags-for-easy-storage-and-travel/#respond), and I put all the small bags in an empty Kleenex box.  I had seen this idea before but I can't really remember were.

Check out my before and after pictures.  What a difference!  and it took less than 30 minutes. 

BEFORE
AFTER
AFTER


September 17, 2012

Paint Car Tracks on Paper Roads

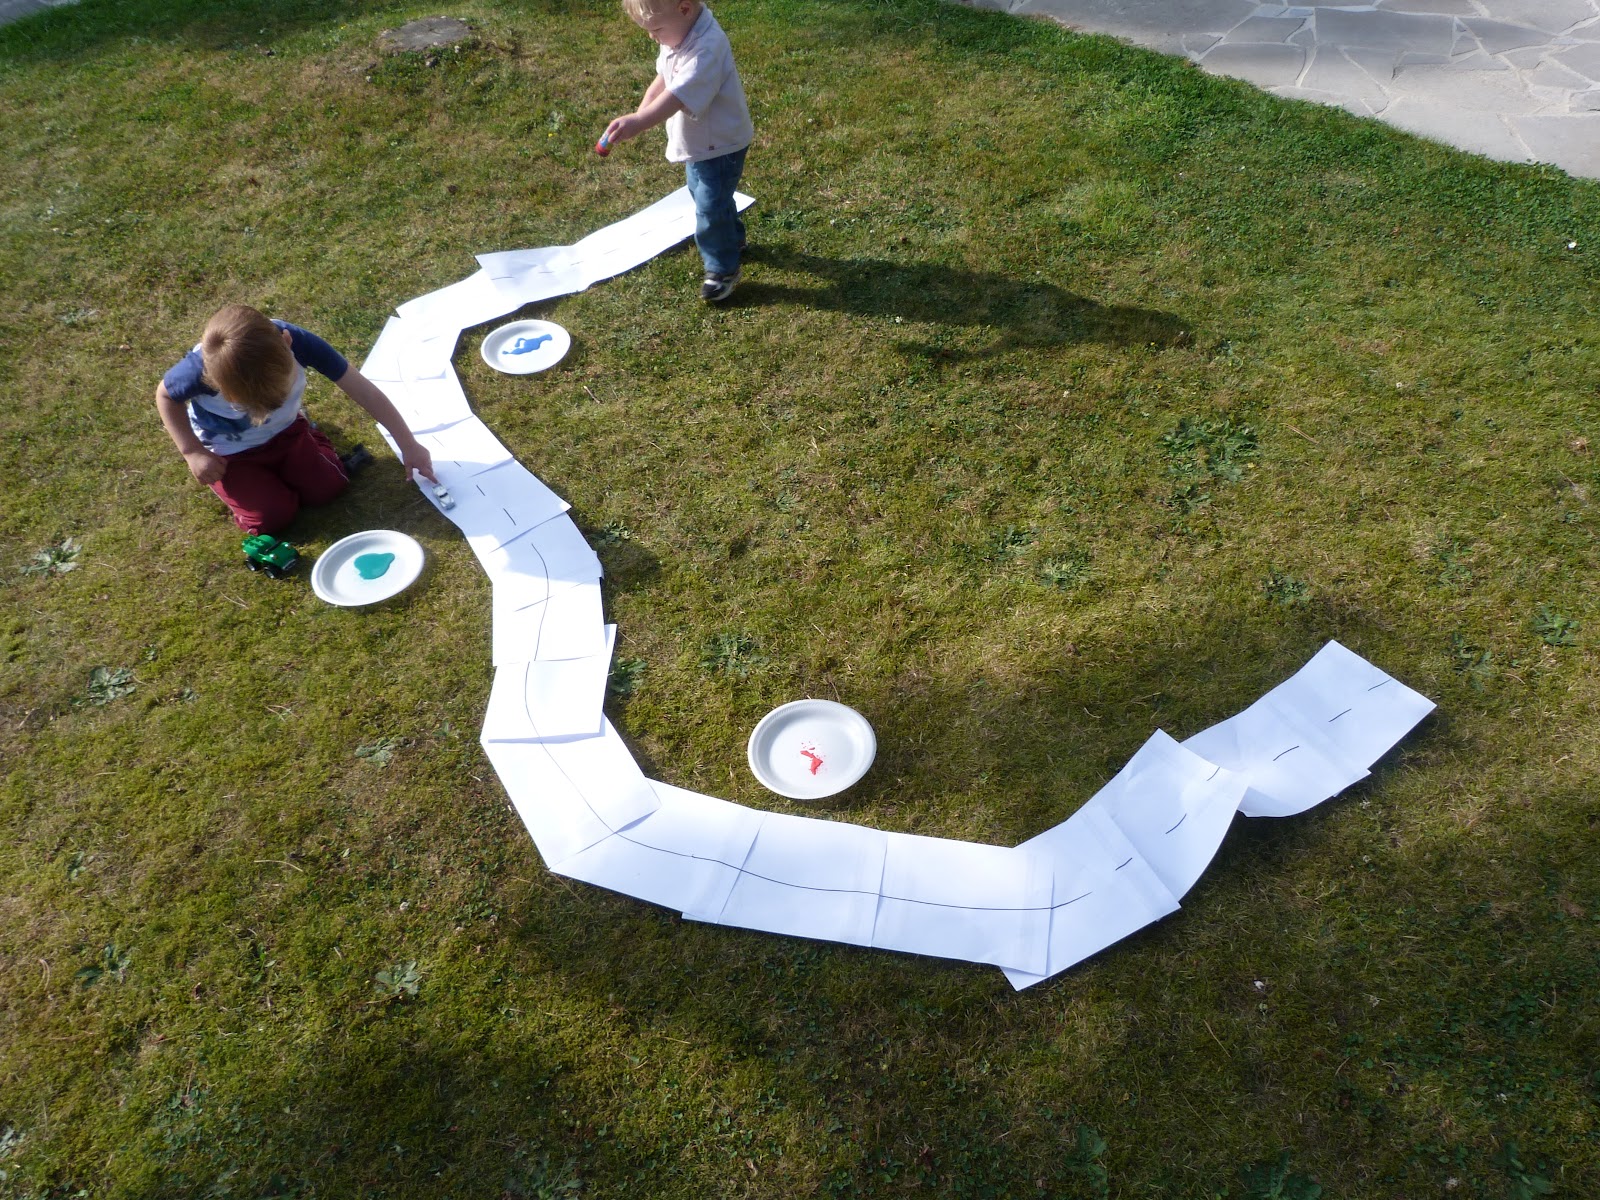
Paint car tracks on paper roads

Keeping my little boys entertained and motivated to try different things is one of my top priorities these days.  I have made a commitment to myself to expose them to creative play by introducing different materials and ideas that encourage them to imagine, dream, and play together.  I know they are still a little young to do all the above but my idea is to slowly build it up.

On Monday after searching for toddler play ideas I came across some different ways to play with paint....with cars!  Well I don't how that never occurred to me but once I saw it I thought to take it a step further and make a road out scrap paper to let the cars drive around.  This was really easy to do and it kept my boys entertained for about 30 minutes (which is a long time for a soon to be 3 year old and a 15 month old).

To make the road I took about 20 sheets of scrap paper.  I put them together with tape on the back. and then took it outside and, on the blank side, I drew lines with a black marker to make two lanes.  I then took 3 or 4 different paint colors in paper plates and placed them (with tape underneath) on different spots along the road.  I told the kids that the paint was gas and that the cars could stop at any of the gas stations to fill up while continuing on their way.  They loved it.

The best  part for me was that cleanup was so easy.  For the road and gas stations it was just a matter of picking it up and throwing it into the recycle bin.  For the cars cleanup I decided that the best was to take them to the car wash...basically I fill out my sink with soap and water and the kids and I gave the cars a good scrub.  Which preschooler doesn't enjoy playing with soap, bubbles and water? My oldest really enjoyed it, the little one felt like  doing something else.

September 04, 2012

Children's Cool Cardboard Car Wash

DIY children's cardboard carwash
My son loves to go through the car wash and thinks this is something everyone does every weekend.  He likes it so much that sometimes when we ask him what he wants to do for the day he will say:  "wash car".  For him the car wash is as good as going to the park.  That is why a few months ago we decided to build him an outside car wash for his toy cars.  Searching different options I found a really cool one on the Disney Family Fun website, but we never got around getting all the materials...and as it is already September we decided to wait until next spring and then give it another try.

Then last week Monday I set myself to let Nicholas enjoy the last week of school vacation as much as possible.  I had a few activities planned but still had some free space in the calendar so I thought probably the best ways to fill those gaps was to give him a new toy, but instead of buying one I would make him one.  I found this website, http://www.filthwizardry.com/2009/01/home-made-toy-carwash.html and use it as inspiration to make a cardboard car wash.  I used only things I had around the house and it took me about two hours to complete.

I started making it on the spot so there wasn't much planning ahead, the only thing I knew was that I wanted it to be interactive and only with materials I had in the house.    I decided to have 3 interactive stations to make it easy, manageable and playable (my son is not yet 3).  First station had two top spin wheels, the second station had two side spin wheels and the third station was the dryer.   For materials I was lucky enough to find a box on my recycling bin that had transparent sides and top which were perfect for the visibility of  the different stations and for the entrance and exit doors.  For the top spin wheels I used red cardboard and rolled it onto wood skewers, for the side spin wheels I used felt scraps and also rolled it onto wood skewers.  For the dryer I used colored serpentine and punched a few wholes on the box to blow air through and create serpentine movement.  I also decided to cover the box with serpentine to create a car wash feel on the box.  This last step was the longest. 

Needless to say, as soon as my son woke up from his nap, he started playing with the car wash giving his cars a good scrub ;0).  He loved it! and I was also really happy with the results.

Materials:
-rectangular box
-4 wood skewers
-serpentine
-colored cardboard paper
-felt scraps
-white glue

How to:
1. Start by cutting out the sides of the box to make entrance and exit areas for the cars


2. Cut 8 small 1x2 inch rectangles of cardboard paper
3. Cut fringes in each piece of cardboard paper and then roll 4 pieces onto one skewer one behind the other starting on the center and moving out.  Do the same with another skewer and fill it up with the remaining pieces of paper
4.  Wrap the felt scrap pieces onto the remaining two skewers.


5.  Cut serpentine in the size of the internal length and width of the box (taking into consideration that part of the serpentine will be pasted onto the top of the box).  The serpentine is supposed to be the hanging loose clothes used for drying the cars .  Paste this section onto the top end side of the box close to the exit side.


6.  Close to the Entrance side of the box, make two parallel holes going from top to bottom to fit the felt skewers.
7.  On the center of the box make two set of holes crossing the upper side of the box going from one side to the other.  This will be where the upper spin wheels will be located.


8.  Install all wheels in place.
9.  Cover the box with pretty paper, serpentine(in my case) or just add the words car wash to it. 

August 13, 2012

Easiest cupcake glaze ever!


Over the weekend we celebrated my son's birthday with family, friends and red velvet cupcakes.  My hubby and I made them after founding a delicious recipe from browneyedbaker.com and we had our first attempt at decorating cupcakes.   We did not use the cream cheese frosting as the recipe suggests because my husband doesn't like anything with cheese on (even if its only in name).  Instead we used a Martha Stewart recipe for a super easy glaze.  I adjusted the suggested quantities a little, added red and yellow coloring (our theme was Mickey Mouse) and the cupcakes looked and tasted great. 

Ingredients:
-1/2 medium orange (squeeze juice)
-1 cup Confectioners sugar
-powder food coloring 

Mix the orange juice with the confectioners sugar until a paste is form.  If you want the glaze to be runny add more orange juice, if you prefer it to be thicker then add more sugar.  Once you are happy with the consistency, add the food coloring of your choice and apply onto cupcakes immediately.  (Cupcakes should be cold).


July 16, 2012

Boring Pinecones?


I have a pine tree in my front garden and for the last 3 months it has been letting off tons of pine cones every week.  So last week, while mom was still visiting, we decided on crafting with the kids and the obvious choice was to use pine cones.  Mom and I also did some pine cone painting and mom made one that I really liked and I ended up using it as part of my dinning room decor.

The funny thing is that I always thought of pine cones as a Christmas sort of thing and never imagine using them other than for Christmas.  But since last week I have a new perspective on pine cones and I thought it would be nice to share, so here it goes:

 You only need:
-paintbrush,
-paint,
-glitter,
-pine cones (different size and shapes for a nicer effect)
-open bowl or decoration dish.  


The process was very easy just paint the pine cone with the paintbrush and immediately pour on some glitter and let it dry for a few hours. 
Once dried, arrange all pine cones in a bowl and add the painted pine cone(s) as accent or focal point for the arrangement.