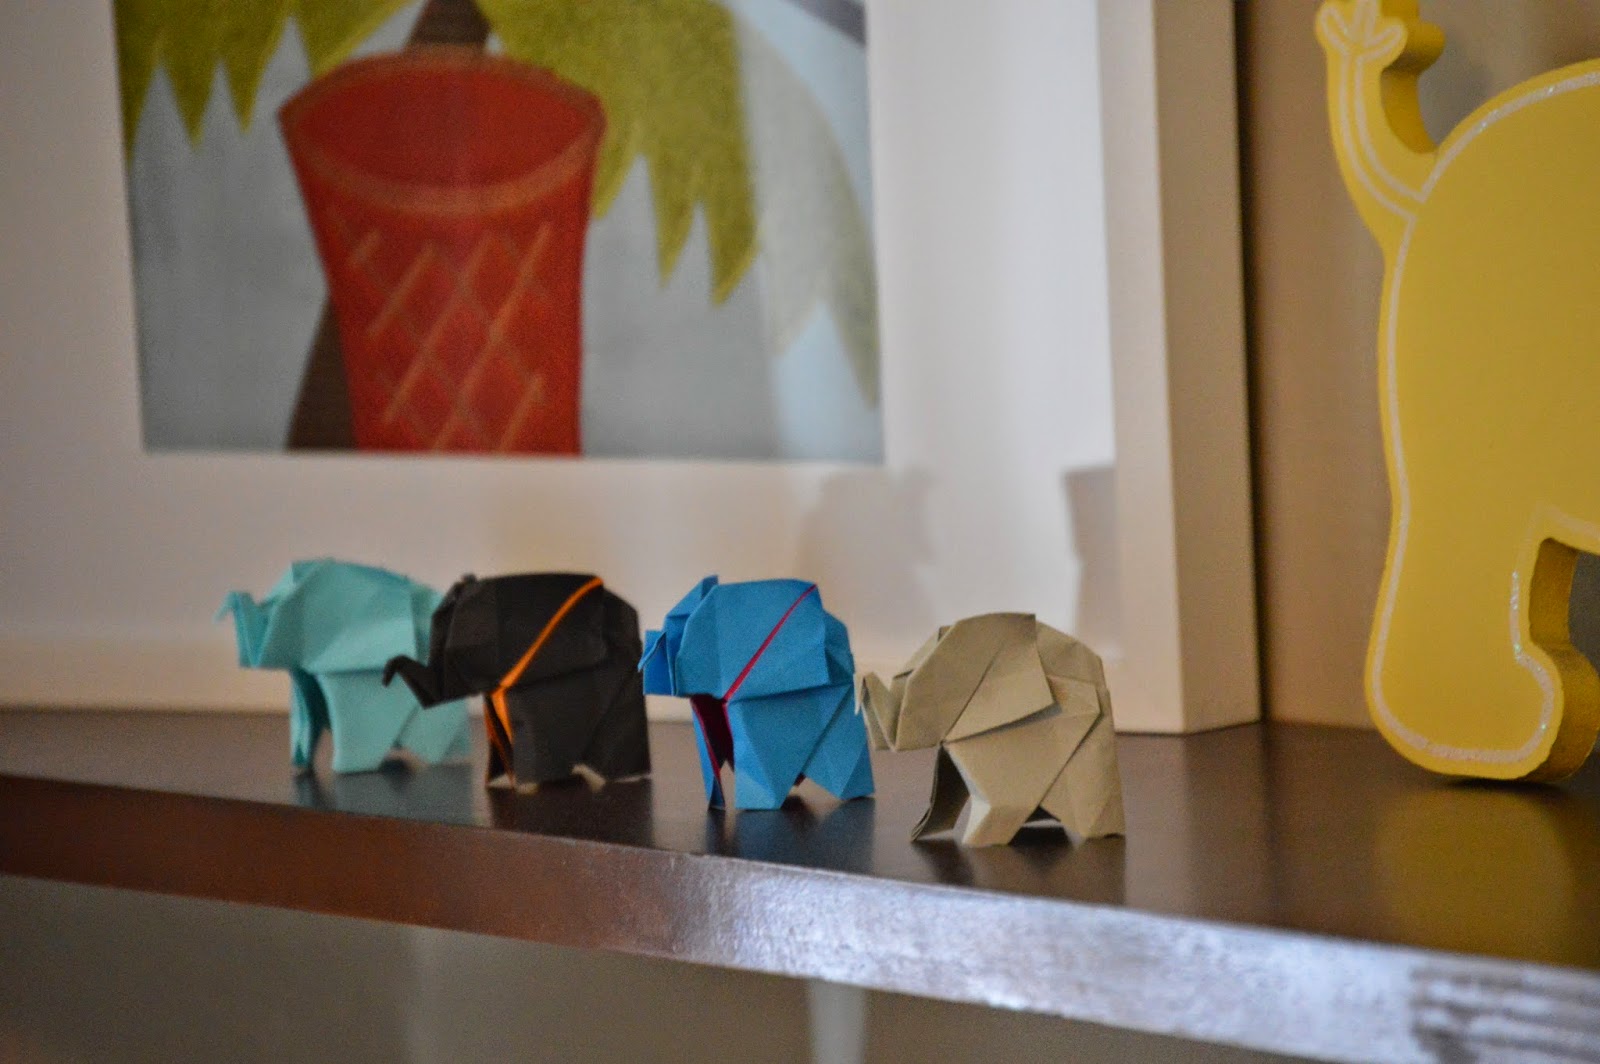
Cute and Original Origami Elephant for decorating Nursery
Using Origami for decoration is relatively new to me. I've played with Origami, I made a swan once and I was impressed by the origami balloons (a cube made out of paper where a gentle blow puffs it up into a balloon), and I even fold my plastic bags using an Origami technique, but never really though of it as a decorating alternative. That is until my mom started trying Origami last summer. She made boxes, stars, and some animals. She even made a whole bunch of Christmas ornaments in beautiful pastel colors using paper with intricate designs. The combinations were really gorgeous. I have another post on that coming up.
 |
| origami elephants |
http://www.origamispirit.com/2013/04/how-to-make-an-origami-elephant/
I think this ended up looking really cute and I think it adds a lot of color and personality to the nursery. I love the way it sits with the rest of the room.
DIY: Simple Pipe Cleaner Snowflakes
I have not mention it yet, but me and a friend are teaching and Intro to Spanish class for preschoolers. We are in our trial period right now, and depending on how things go, we might make it into a full class for September this year. We will see...In any case, for the lesson I prepared for this past week, I wanted to have a fun activity. The theme was "The Weather" and textured, colorful little snowflakes were a perfect visual aid for the little guys.
The good news is that after the lesson, the kids can keep these snowflakes and use them as fun winter decorations. (They would've also been great for Christmas but I had so many other projects around Christmas time that these one never popped to mind).
So in any case, I took my Spanish lesson as an opportunity to create a tutorial about how to make a simple pipe cleaner snowflake. I am sure there are a lot of snowflake tutorials out there, but on purpose, I did not Google any of them, so any similarities with others you might see are pure coincidences.
Let's begin: they are very easy to make, you can make them small using just 1 pipe cleaner or big using 3 pipe cleaners. Personally I think the snowflakes look much cuter in the smaller version, so I thought it was better to make a lot of small snowflakes versus one or two of the bigger one.
If you are making the bigger version (using 3 pipe cleaners) just go to step 5 and tie the pipe cleaners as on the picture
 |
| Step 1: "Z" shape the pipe cleaner |
 |
| Step 2: Gather all the sides |
 |
| Step 3: "tie" the pipe cleaners in the middle |
 |
| Step 4: Cut the loops |
 |
| Step 5: this is the way it should look once you cut the loops. |
 |
| Step 6: Make a "Z" on each of the 6 legs |
 |
| Step 7: then pull the "Z" down towards the rest of the "leg" and form a "Y". Repeat for each side |
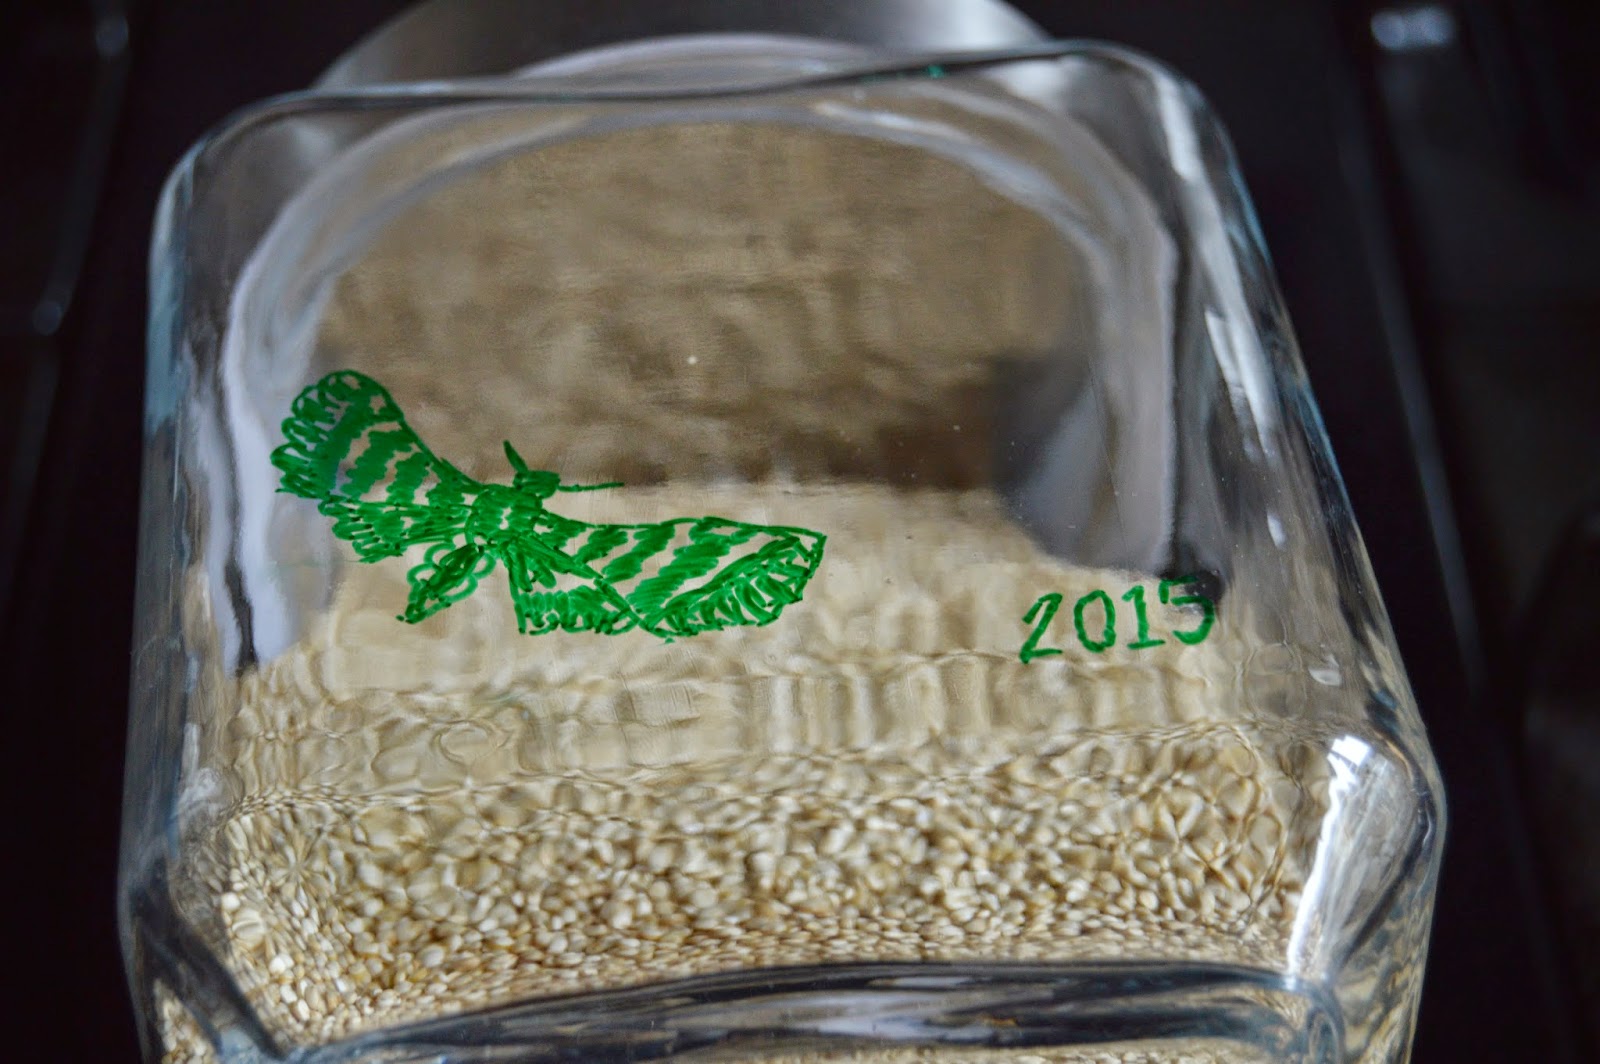
Doodling on Glass Canister
One morning, back in October last year, I opened my pantry and a moth flew out. I thought it strange, but didn't worry about it until a few days later, when I was killing time reading my local discussion forum and one of the titles read: "help: pantry moth infestation." P A N I C! Did I have an infestation I did not know about?....It turns out I didn't, but I did google "pantry month" and realized that moths could enter your pantry, feed on anything that is not fully and properly sealed, lay eggs and create and infestation pretty quick. Also, this apparently is a result of very warm summers and leaving back doors open. So basically my open oatmeal or flour packages were a moth feast just waiting to happen.
Needless to say I went on a pantry cleaning spree, taking everything out and throwing out every opened box. I guess the moth I found had probably just entered the pantry and I caught it just in time. But in any case I got enough glass containers to put all of my pantry staples to avoid any chances with infestations.
The glass canisters were just plain, transparent glass with silver colored lids. They looked good enough for a simple pantry glass container, but I thought it would be an added benefit to "beautify" them into differentiation (flour or powdered sugar?) so I took a fine tip over-projector marker and started doodling. It literally took me all of 5 minutes, and it brought me back to my high school days when I spent lots of time doodling in the back of my notebooks.
My idea of beautifying the plain canisters .......a moth.
Simple, efficient, and DIY were you can put your personal stamp on!
And by the way, when you want to change the content of the glass canisters, just clean the doodles with water or rubbing alcohol.

Plated dinner, the experience
I have been wanting to try Plated dinners for a while now and today I got my first trial box. Just in case you don't know Plated, they are a company that provides customers with weekly menus and ingredients portioned for an easy cooking experience. All dinners are supposed to take 30-40 minutes and customers are able to choose the type of menus they want to receive. It's not a cheap option for a family of 5 (as every plate costs $10) but it is a great alternative for young working couples who don't have much time for grocery shopping before dinner but still enjoy the idea of having a homemade meal at the end of the day.
Well, I'm not single, or working full time, but I still LOVED the experience! I guess that is part of what this is all about... a whole experience which starts when you first get the box delivered home. When you open in it you see a world of culinary possibilities! With beautiful recipe cards and all fresh, organic ingredients to make healthy, tasty, and beautiful looking dishes. It just makes you want to keep buying their menus on a weekly basis.

Although for me this will not happen, I have to say that my first experience has been great! The recipe I made today was Vietnamese Beef Pho and the taste was very pure. All ingredients were fresh, rightly portioned, the meal took about 40 minutes to be ready and the recipe was easy to follow.
My husband and I really enjoyed it.
Look at the pictures, do you see what I mean?
Treasure Finding
Treasure finding in second hand stores or garage sales is one of my favorite things. I really got into it while living in Belgium.
Many expats, English speaking families and thus my own lived in the town of Waterloo (close to Brussels). Famous for the Battle of Waterloo, ABBA's hit single, and most recently, for its Antiques' Market that happens every other Sunday at the Carrefour (Walmart-type French super store) parking lot on the road to Braine L'Alleud. It is a HUGE market and very popular with tourist and Antique collectors throughout Europe.
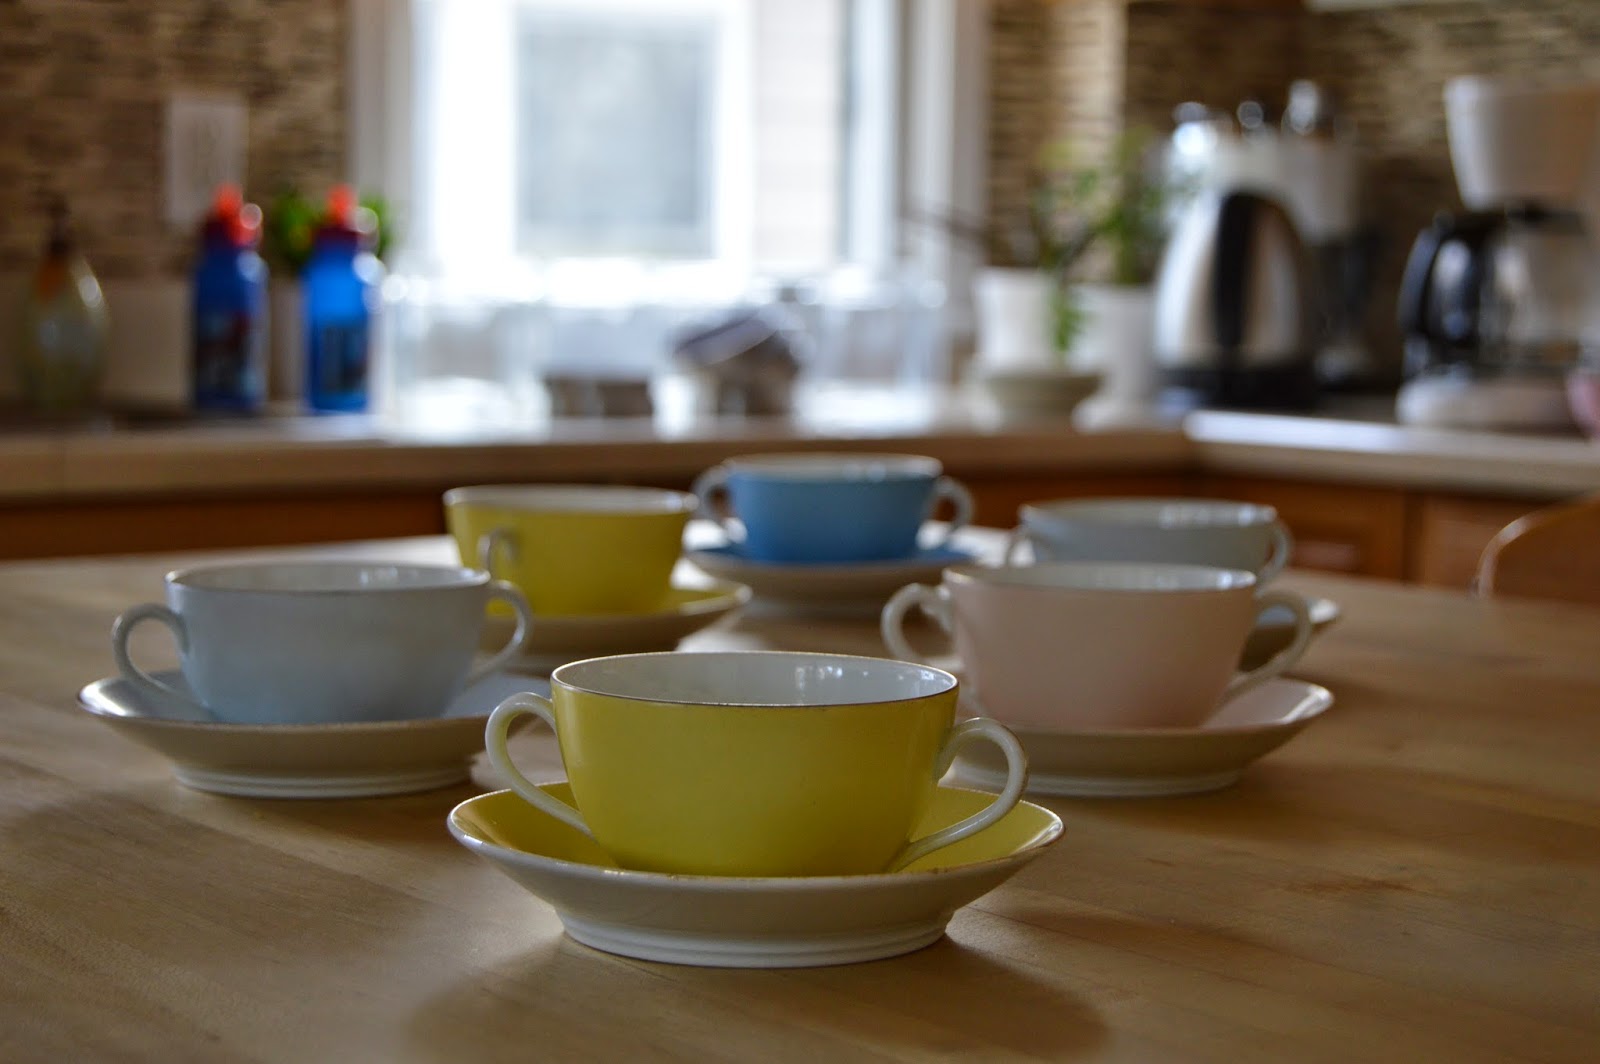
So when I moved to NJ, I thought I was bidding goodbye to my treasure searching days but I'm glad I was wrong. In this area, northern New Jersey, during Spring and Summer, there are so many garage sales on the weekends that you can make it a whole day out sort of thing. Also, on average there are four Estate Sales per month throughout the year mostly from homes that are close to a million dollars. However I have yet to attend a Estate Sale, I guess I don't feel the need when I can shop from my local SWAP facebook page. Seriously, it is very easy to get addicted to it. There are always great deals. So it is here where I got these beautiful vintage stamped and numbered, pastel colored set of 7 tea cups and saucers from Marx and Guntherz Carslbad. And the best part is that I only paid $20 for the whole set
Well, I don't know much about them except that this specific type was made between 1895 an 1919 in Germany. And somehow that is all I need to know. Maybe its because the lack of information lets my imagination take over and I can see rich beautiful women at Hightea somewhere in England.
Maybe too much Downtown Abby ;)
My new Dikon 3200
...finally arrived!I am still playing with it whenever I have a chance although with 3 kids under 5, and no school yesterday or today, it's been a little challenging to find the time.
I was able to get a good 10 minutes ;) after lunch when the kids sat to watch some Octonauts and my little one sat quietly next to me so I decided to photograph my beautiful vintage Marx and Gutherz tea cups and saucers set.
Have a look at a couple of the pictures, I love these cups!(most on these cups coming up later this week)
Organizing Reusable Plastic Bags:
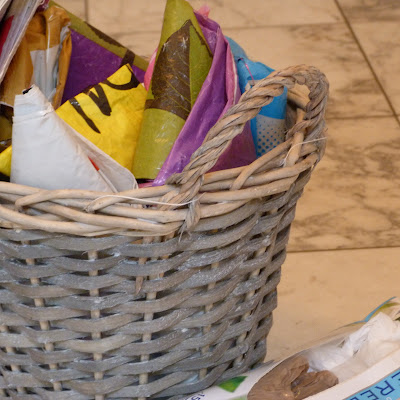
In Europe (at least most of Western Europe) free bags are not available for grocery shopping. About 6 or 7 years ago, grocery stores stopped providing free plastic bags for packing groceries and started offering either large strong plastic bags for a fee or encouraging totes in an effort to cut the amount of plastic bags ending in landfills and boosting the re-use of purchased plastic bags.Before plastic bags had to be purchased, I used to use the free bags on the bathroom trashcans, which was my own way of re-using so I never had many bags laying around. After the grocery chains changed their approach to free bags I adapted myself by purchasing the sturdy plastic bags about once per year. The negative side is that I have too many bags now laying around and taking space. So I decided it was time to learn to fold them and keep them organized to take back some much needed space.
To fold the large bags, I used a simple method I found on Origami Spirit blog (http://www.origamispirit.com/2012/01/how-to-fold-plastic-bags-for-easy-storage-and-travel/#respond), and I put all the small bags in an empty Kleenex box. I had seen this idea before but I can't really remember were.
Check out my before and after pictures. What a difference! and it took less than 30 minutes.
 |
| BEFORE |
 |
| AFTER |
 |
| AFTER |
Granola: Original Hostess Gift
A couple of weeks ago we had some friends over for a visit. It was nothing special just a weekend with friends we hadn't seen in a few months. We were not expecting our guest to bring anything, but both couples actually did. One of them brought a swing for the two kids, and the other a very interesting homemade granola.
That morning when we called one of them to ask at what time they expected to arrive (they had a 2 hour journey), they told us that they were about to leave but they hadn't yet because they were waiting for our gift to "cool down". We didn't think much of it except that maybe they were bringing some sort of cake or dessert.
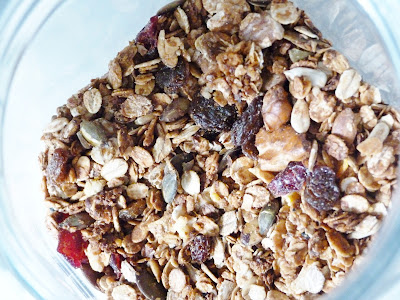
Well, you can imagine our surprise when our hostess gift was giftwrapped and still a little warm. It was also heavy and obviously inside some sort of jar. I was so curious, and when I opened it, to my surprise, I saw granola on a simple but beautifully looking airtight canister that had a decorative tulip napkin on top. Wow! that was a totally different, original, unexpected, and as we later realized, delicious hostess gift.
PS: It will definetely be oatmeal based
Paint Car tracks of paper road: Activity for children
Keeping my little boys entertained and motivated to try different things is one of my top priorities these days. I have made a commitment to myself to expose them to creative play by introducing different materials and ideas that encourage them to imagine, dream, and play together. I know they are still a little young to do all the above but my idea is to slowly build it up.
On Monday after searching for toddler play ideas I came across some different ways to play with paint....with cars! Well I don't how that never occurred to me but once I saw it I thought to take it a step further and make a road out scrap paper to let the cars drive around. This was really easy to do and it kept my boys entertained for about 30 minutes (which is a long time for a soon to be 3 year old and a 15 month old).
To make the road I took about 20 sheets of scrap paper. I put them together with tape on the back. and then took it outside and, on the blank side, I drew lines with a black marker to make two lanes. I then took 3 or 4 different paint colors in paper plates and placed them (with tape underneath) on different spots along the road. I told the kids that the paint was gas and that the cars could stop at any of the gas stations to fill up while continuing on their way. They loved it.
The best part for me was that cleanup was so easy. For the road and gas stations it was just a matter of picking it up and throwing it into the recycle bin. For the cars cleanup I decided that the best was to take them to the car wash...basically I fill out my sink with soap and water and the kids and I gave the cars a good scrub. Which preschooler doesn't enjoy playing with soap, bubbles and water? My oldest really enjoyed it, the little one felt like doing something else.
Children's Cool Cardboard Carwash
My son loves to go through the car wash and thinks this is something everyone does every weekend. He likes it so much that sometimes when we ask him what he wants to do for the day he will say: "wash car". For him the car wash is as good as going to the park. That is why a few months ago we decided to build him an outside car wash for his toy cars. Searching different options I found a really cool one on the Disney Family Fun website, but we never got around getting all the materials...and as it is already September we decided to wait until next spring and then give it another try.Then last week Monday I set myself to let Nicholas enjoy the last week of school vacation as much as possible. I had a few activities planned but still had some free space in the calendar so I thought probably the best ways to fill those gaps was to give him a new toy, but instead of buying one I would make him one. I found this website, http://www.filthwizardry.com/2009/01/home-made-toy-carwash.html and use it as inspiration to make a cardboard car wash. I used only things I had around the house and it took me about two hours to complete.
I started making it on the spot so there wasn't much planning ahead, the only thing I knew was that I wanted it to be interactive and only with materials I had in the house. I decided to have 3 interactive stations to make it easy, manageable and playable (my son is not yet 3). First station had two top spin wheels, the second station had two side spin wheels and the third station was the dryer. For materials I was lucky enough to find a box on my recycling bin that had transparent sides and top which were perfect for the visibility of the different stations and for the entrance and exit doors. For the top spin wheels I used red cardboard and rolled it onto wood skewers, for the side spin wheels I used felt scraps and also rolled it onto wood skewers. For the dryer I used colored serpentine and punched a few wholes on the box to blow air through and create serpentine movement. I also decided to cover the box with serpentine to create a car wash feel on the box. This last step was the longest.
Needless to say, as soon as my son woke up from his nap, he started playing with the car wash giving his cars a good scrub ;0). He loved it! and I was also really happy with the results.
Materials:
-rectangular box
-4 wood skewers
-serpentine
-colored cardboard paper
-felt scraps
-white glue
How to:
1. Start by cutting out the sides of the box to make entrance and exit areas for the cars
 2. Cut 8 small 1x2 inch rectangles of cardboard paper
3. Cut fringes in each piece of cardboard paper and then roll 4 pieces onto one skewer one behind the other starting on the center and moving out. Do the same with another skewer and fill it up with the remaining pieces of paper
4. Wrap the felt scrap pieces onto the remaining two skewers.
5. Cut serpentine in the size of the internal length and width of the box (taking into consideration that part of the serpentine will be pasted onto the top of the box). The serpentine is supposed to be the hanging loose clothes used for drying the cars . Paste this section onto the top end side of the box close to the exit side.
 6. Close to the Entrance side of the box, make two parallel holes going from top to bottom to fit the felt skewers.
7. On the center of the box make two set of holes crossing the upper side of the box going from one side to the other. This will be where the upper spin wheels will be located.
8. Install all wheels in place.
9. Cover the box with pretty paper, serpentine(in my case) or just add the words car wash to it.
Family Crossword Puzzle Wall Art
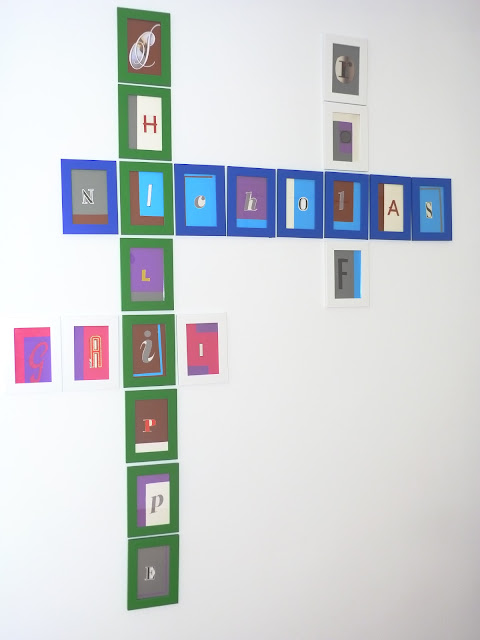
I came up with this idea after stumbling upon a Scrabble like crossword puzzles Posh Tots with the words "Imagine, Dream, Believe" on it. The crossword puzzle looked beautiful, made in wood but to me the cost was just way to high at $500. Based on that idea I started looking at a few other examples on Pinterest and I found one I liked using white canvas and painted black letters. With these two inspiring ideas in mind I put myself to work in designing something of my own. The basic idea was clear: Crossword puzzle. The additional requirements were to make it personal, make it colorful, and not spend more that 50 Euro (about $60) on it.
When thinking about personalizing something the quickest thing that comes to mind is names. So I decided to use our names instead of other words. I thought it was also a clever way to show the family link we share. To make the wall art colorful, I decided on choosing different matching colors for each member to keep some consistency. With these ideas I went to Ikea to see what I could come up with. I was really lucky to find picture frames for 1 Euro each. I selected white frames for me and my husband and green and blue frames for each of the kids. For the letters I used old magazines cutouts and for the background I used different color cardboard paper.
I think the outcome really worked and it could not been any cheaper. I spent less than 40 Euro ($50) in total and my wall is filled up with a personalized wall art.
Materials:
 -colored picture frames. (I used Ikea's but an alternative is to get plain frames and paint them)
-old magazines/children's book, etc
-scissors
-color cardboard paper
-photo adhesive squares or double sided tape
-ruler
How to:
-First try a few different crossword name options on paper.
Make sure you match the best crossword option to the size of the wall you want to use. In my case, both my kids have long names (13 letters each) while me and my hubby have short names (4 letters each). So for us it worked best to have my pre-schooler's name going down and my toddler's name going across, that guaranteed that the full wall was used.
-Based on the crossword option selected, count how many frames you need (1 for each letter) and select the color theme for each name.
-Go through different magazines or children's book and cut out the biggest letters you can find making sure they fit in the frame. I you can't find the right letters just print some and cut them out.
-Measure the inside of the frame to make cardboard cutouts that will serve as backgrounds to the letters.
-Try matching the cardboard and the frame colors for more appealing results.
-Arrange all frames, cardboard paper cutouts and letters on a large table to make sure you like what you see (color coordination, letter arrangement, not missing any letters, etc)
-Once you are happy with what you see start pasting the letters on the cardboard paper with the use of the photo adhesive squares.
-Add any additional decoration onto the cardboard (polka dots, framing lines, etc.) and fit the cardboard paper (with the letter) into the picture frame
-Hang onto wall
Lovely Thistles
Last weekend, my mother in law came to visit and she brought with her a beautiful bouquet made out of white roses, cresentias and thistles! Yep, I never expected to see thistles in a bouquet and believe me, it has been one of the most beautiful flower arrangements I've ever received. Not only do the white and lila color combination look lovely, but the bouquet has a great sense of space. What I mean by this is that every thistle, every rose, every cresentia has its owns space, it is not crowded, and I think it is all thanks to the very different dimensions and sizes of these three flowers. It just feels as this combination was always meant to be together, yet it is the first time I see it.
It has been one of those simple little things that has brought a smile to my face everyday when I see it. Hope the picture sort of does the same thing to you too!
Son's fingerpaint and Mom's decoupage
My 2.5 year old son loves to paint. He usually doesn't spend a lot of time on it, maybe 10 minutes or so, but once he is done with painting he always wants to show it off. So when my fridge could not handle all the drawings he was making I decided to designate a small corner wall in my dinning room as his art wall.
There have been three paintings hanging there for about 5 months now and they keep "calling" me. I really like the color coordination and the "style", if you can say that of preschooler art. So I thought those three pieces of paper deserve a better place and my bathroom downstairs has been a little empty lately.
A few ideas pop to mind (mainly framing them) but I thought that did not make them special enough so I decided on the next best thing...decoupage them. I don't know why but there is something very relaxing about adding glue onto something and smoothing it out with a sponge or brush.
Check out the instructions below on how I turn my son's drawing into modern art for my bathroom wall.
You will need:
 -canvas (size in EU=24 x 18cm, US=8"x10")
-decoupage brush/sponge
-mod podge or the equivalent white glue for decoupage
-temporary spray adhesive/glue for thin paper

-tape
-child's art
-printer/copier
-tissue paper
-standard white paper (EU=A4, US=8.5"x11")
How to:
 1.
First cut the tissue paper about 2cm (1 inch) longer and wider than the
standard white paper. The idea is that you can wrap the tissue paper
around the white paper. Use only enough tape to hold the tissue paper
in place (1 small piece of tape per side)
1.
First cut the tissue paper about 2cm (1 inch) longer and wider than the
standard white paper. The idea is that you can wrap the tissue paper
around the white paper. Use only enough tape to hold the tissue paper
in place (1 small piece of tape per side)2. Add the white paper covered in tissue paper (step 1) to the printer making sure the tissue side will be the one printed.

3. Make a color copy of your child's art and let the ink dry for a few minutes.
 4.
Take the tissue paper off the white paper. Once you've separated both
paper take the white sheet and add very little spray adhesive onto the
surface. Let the spray adhesive dry for a couple of minutes (to avoid
ruining the print) and then paste the tissue paper (printed
side) onto the white sheet (the side having the adhesive). Make sure
that the tissue paper is straight and has no folds.
5. Apply one thin coat of mod podge onto the canvas making sure it covers the whole surface. As soon as you are done applying the mod podge, position the tissue paper (adhered to the white sheet) on the canvas upside down to a hard surface.
 6.
With a straight object (I used a piece of wood) "comb" the canvas to
make sure that the tissue paper (underneath the canvas)and the canvas
are being pasted without any air/glue pockets. Work fast because the
glue will dry quickly.
 7.
When you have combed the entire surface of the canvas, turn it around
and remove the white sheet of paper being careful not to tear the tissue
paper underneath. Then smooth out any left over air pockets. Work
slowly and preferably only with finger tips.
7.
When you have combed the entire surface of the canvas, turn it around
and remove the white sheet of paper being careful not to tear the tissue
paper underneath. Then smooth out any left over air pockets. Work
slowly and preferably only with finger tips.8. Once the front part is glued work on the sides by covering the edges with mod podge and folding the remainder tissue paper over them.
9. Let the canvas dry and then pull out or cut the leftover tissue paper.
10. Let it dry for 30 min. and then cover the canvas with one thin and quick coat of mod podge to protect the art.
Vintage Combs
Follow the instructions below to create your own combs... which could accomodate to different occasions and styles including romantic or modern wedding hair styles
 First, fold the ribbon
(approximately on a 45 degree angle) so the back of the folded piece is against
the back of the rest of the ribbon.
Then start folding the
front, so the front of the ribbon touches the front of the rest of the ribbon. The
angle should be tighter in the center and looser on the edges to create a circumference
with the ribbon (In some cases it's easier to use pins to hold the fabric in
place).
Continue to do this
until you overlap the starting point by at least 1/4 of the way (you can
continue for 2 or 3 rounds if you wish).
Once you are happy
with the flower shape, cut the ribbon from the roll and fold it in, so you can't
see the unfinished edge.
Stitch at the center
of the flower in such a way that you hold ALL folds in place.
Add beads in the center
to cover the stitching from before.
You can layer flowers
with different fabrics to create texture. Just make sure the bottom flower is
made with a wider ribbon. Add feathers and other embellishments, and make sure
you stitch them in place.
Stitch the comb on the
back of the flower and your vintage comb is done!
Hortencias and the Watering Can
I came back to Brussels last week with mom who travelled back with me to help with the kids and the 11 hour flight.
My first impression is how much work the house needed after 5 weeks of me being away, specially the garden. However, the good part was that my Hortencias (or Hydrangeas as they are more commonly known in other parts of the world) were in full bloom and in all colors ranging from pink to turquoise, and purple to blue. I love the look they give to the garden and they are the easiest to care for!
Anyways back to my mom, you know how it is always nice to have a new perspective on an area of the house you are not quite happy about? Well I have been stuck on this watering can which I bought sometime ago in a second hand market here in Brussels. When I boughted I love the feel of it and I thought it would give a nice look to the kitchen, but I have been struggling in finding a way to make a statement with it. So I took advantage of the "new perspective" situation and ask mom to have a look and see if she could think of something. And she did.
Here is what you need to create something similar:
 -Hortencias,
-Dried willow branches
-Ribbon
-Statement vase, or any sort of container that has a nice rustic/old feel to it.
To put it together:
loved it, what do you think?
Boring Pinecones?
I have a pine tree in my front garden and for the last 3 months it has been letting off tons of pine cones every week. So last week, while mom was still visiting, we decided on crafting with the kids and the obvious choice was to use pine cones. Mom and I also did some pine cone painting and mom made one that I really liked and I ended up using it as part of my dinning room decor.
The funny thing is that I always thought of pine cones as a Christmas sort of thing and never imagine using them other than for Christmas. But since last week I have a new perspective on pine cones and I thought it would be nice to share, so here it goes:
You only need:
-paint,
-glitter,
-pine cones (different size and shapes for a nicer effect)
-open bowl or decoration dish.
The process was very easy just paint the pine cone with the paintbrush and immediately pour on some glitter and let it dry for a few hours.
Once dried, arrange all pine cones in a bowl and add the painted pine cone(s) as accent or focal point for the arrangement.
Canvas on Easel a Gift Idea
I completed this project with my son who is 2.5 and we were done within 30 minutes. The nice thing about it is that its really inexpensive (not more than $5 if you already have the markers) and the materials are easy to get. I found the mini canvas and easel at a craft store here in Brussels called AVA and the markers at one of the bigger Carrefour stores. I'm sure that in the States you can find everything at Walmart, Michaels or Hobby Lobby.
As they were so quick to make, my son had no problems with making two of the same time so we used them as mother's day gifts for both grandmothers.
-blow markers
-canvas (small)
-easel (small)
-kitchen paper
-paint (optional)
 Set out matching markers' colors and let the kids blow on the markers directly on the canvas.
Let it dry and paint the easel with a matching color or leave it natural wood.
What do you think?











No comments:
Post a Comment