"The best things in life are nearest: Breath in your nostrils, light in your eyes, flowers at your feet, duties at your hand, the path of right just before you. Then do not grasp at the stars, but do life's plain, common work as it comes, certain that daily duties and daily bread are the sweetest things in life"
Robert Louis Stevenson
Showing posts with label decoration. Show all posts

March 16, 2015

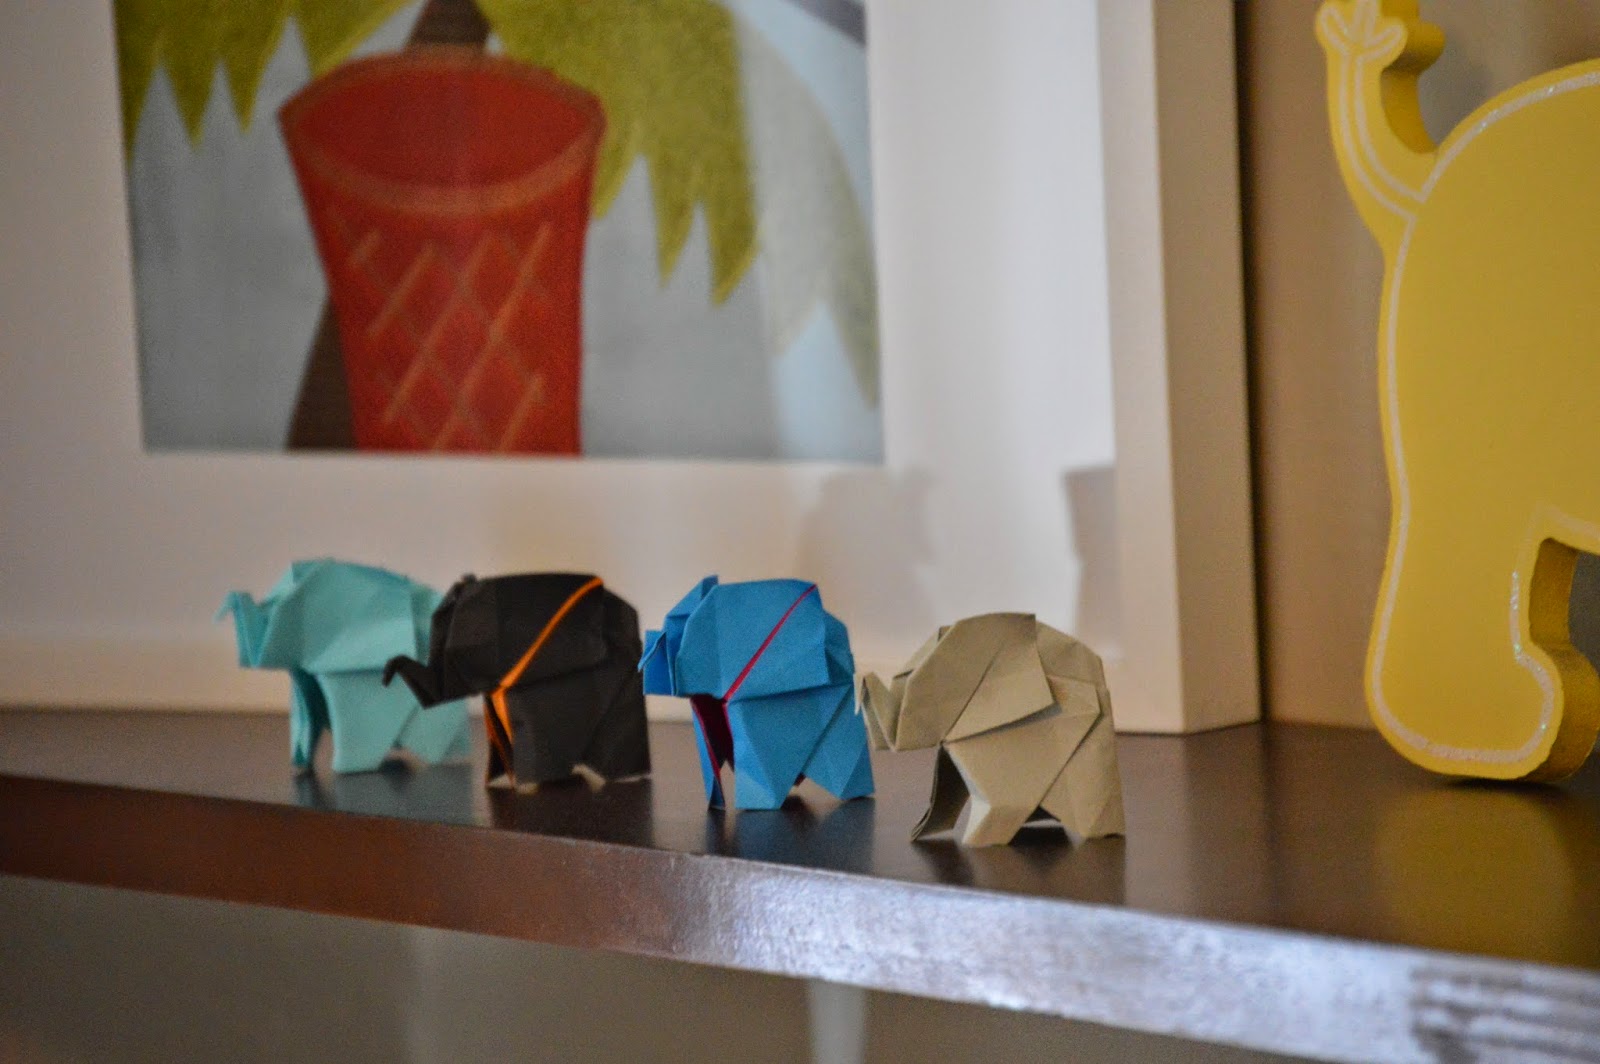
Cute and Original Origami Elephants for the Nursery


Nursery origami elephant
 
Using Origami for decoration is relatively new to me.  I've played with Origami, I made a swan once and I was impressed by the origami balloons (a cube made out of paper where a gentle blow puffs it up into a balloon), and I even fold my plastic bags using an Origami technique, but never really though of it as a decorating alternative.  That is until my mom started trying Origami last summer.  She made boxes, stars, and some animals.  She even made a whole bunch of Christmas ornaments in beautiful pastel colors using paper with intricate designs.  The combinations were really gorgeous.  I have another post on that coming up.

origami elephants
origami elephants
Well back to my first Origami for decoration experience...when she showed me the things she had made I was really impressed.  At the time I was looking into original ways of decorating my new baby's nursery following the jungle theme of the bedding set I had bought for him.  So naturally my first Origami trials were animals.  I tried a giraffe and the elephant and even a butterfly.  The giraffe was not so easy and I did not have enough patience to finish it so after about an hour of trying, I gave up.  The butterfly wasn't so bad, I was able to finish it, but I was having a boy so that was not going to cut it.  I looked into lions, but couldn't find anything that seemed easy enough for a beginner.  However I was able to find a youtube tutorial for an elephant which was easy enough for me to repeat and make more than one.  (My mom actually made the other two for me).  Here is the link to Leyla Torres elephant blog and video tutorial.
 http://www.origamispirit.com/2013/04/how-to-make-an-origami-elephant/
 
Nursery origami elephant
I think this ended up looking really cute and I think it adds a lot of color and personality to the nursery.  I love the way it sits with the rest of the room.

February 08, 2015

DIY: Fun, quick and Easy Pipe Cleaner Snowflake Tutorial


DIY small cute pipe cleaner snowflakes

I have not mention it yet, but me and a friend are teaching and Intro to Spanish class for preschoolers.  We are in our trial period right now, and depending on how things go, we might make it into a full class for September this year.  We will see...In any case, for the lesson I prepared for this past week, I wanted to have a fun activity.  The theme was "The Weather" and textured, colorful little snowflakes were a perfect visual aid for the little guys.

The good news is that after the lesson,  the kids can keep these snowflakes and use them as  fun winter decorations.  (They would've also been great for Christmas but I had so many other projects around Christmas time that these one never popped to mind).

So in any case, I took my Spanish lesson as an opportunity to create a tutorial about how to make a simple pipe cleaner snowflake.  I am sure there are a lot of snowflake tutorials out there, but on purpose, I did not Google any of them, so any similarities with others you might see are pure coincidences.   

Let's begin:  they are very easy to make, you can make them small using just 1 pipe cleaner or big using 3 pipe cleaners. Personally I think the snowflakes look much cuter in the smaller version, so I thought it was better to make  a lot of small snowflakes versus one or two of the bigger one.
If you are making the bigger version (using 3 pipe cleaners) just go to step 5 and tie the pipe cleaners as on the picture

DIY small cute pipe cleaner snowflakes
Step 1: "Z" shape the pipe cleaner
DIY small cute pipe cleaner snowflakes
Step 2: Gather all the sides
DIY small cute pipe cleaner snowflakes
Step 3: "tie" the pipe cleaners in the middle


DIY small cute pipe cleaner snowflakes
Step 4: Cut the loops
DIY small cute pipe cleaner snowflakes
Step 5: this is the way it should look once you cut the loops.
DIY small cute pipe cleaner snowflakes
Step 6: Make a "Z" on each of the 6 legs
DIY small cute pipe cleaner snowflakes
Step 7: then pull the "Z" down towards the rest of the "leg" and form a "Y".  Repeat for each side

July 16, 2012

Boring Pinecones?


I have a pine tree in my front garden and for the last 3 months it has been letting off tons of pine cones every week.  So last week, while mom was still visiting, we decided on crafting with the kids and the obvious choice was to use pine cones.  Mom and I also did some pine cone painting and mom made one that I really liked and I ended up using it as part of my dinning room decor.

The funny thing is that I always thought of pine cones as a Christmas sort of thing and never imagine using them other than for Christmas.  But since last week I have a new perspective on pine cones and I thought it would be nice to share, so here it goes:

 You only need:
-paintbrush,
-paint,
-glitter,
-pine cones (different size and shapes for a nicer effect)
-open bowl or decoration dish.  


The process was very easy just paint the pine cone with the paintbrush and immediately pour on some glitter and let it dry for a few hours. 
Once dried, arrange all pine cones in a bowl and add the painted pine cone(s) as accent or focal point for the arrangement.  


June 21, 2012

Canvas on easel...a gift idea


This post is for a gift idea or decoration project to do with the kids even the really young ones. 
I completed this project with my son who is 2.5 and we were done within 30 minutes.  The nice thing about it is that its really inexpensive (not more than $5 if you already have the markers) and the materials are easy to get.  I found the mini canvas and easel at a craft store here in Brussels called AVA and the markers at one of the bigger Carrefour stores.  I'm sure that in the States you can find everything at Walmart, Michaels or Hobby Lobby.
As they were so quick to make, my son had no problems with making two of the same time so we used them as mother's day gifts for both grandmothers.


You will need:
-blow markers
-canvas (small)
-easel (small)
-kitchen paper
-paint (optional)


Set out matching markers' colors and let the kids blow on the markers directly on the canvas.


Once you are happy with the colors and amount of paint, pat dry the excess with some kitchen paper.


Let it dry and paint the easel with a matching color or leave it natural wood. 
What do you think?