"The best things in life are nearest: Breath in your nostrils, light in your eyes, flowers at your feet, duties at your hand, the path of right just before you. Then do not grasp at the stars, but do life's plain, common work as it comes, certain that daily duties and daily bread are the sweetest things in life"
Robert Louis Stevenson

September 25, 2012

Organizing re-usable Plastic Bags

Plastic bag folding; Origami
In Europe (at least most of Western Europe) free bags are not available for grocery shopping.  About 6 or 7 years ago,  grocery stores stopped providing free plastic bags for packing groceries and started offering either large strong plastic bags for a fee or encouraging totes in an effort to cut the amount of plastic bags ending in landfills and boosting the re-use of purchased plastic bags. 

Before plastic bags had to be purchased, I used  to use the free bags on the bathroom trashcans, which was my own way of re-using so I never had many bags laying around.  After the grocery chains changed their approach to free bags I adapted myself by purchasing the sturdy plastic bags about once per year.  The negative side is that I have too many bags now laying around and taking space.   So I decided it was time to learn to fold them and keep them organized to take back some much needed space.

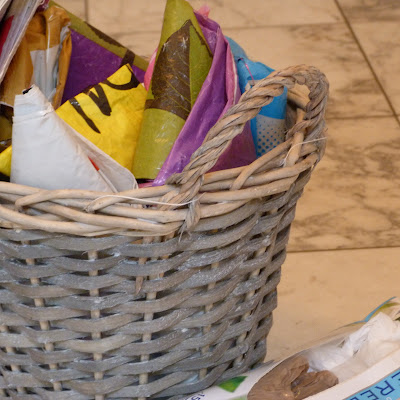
To fold the large bags, I used a simple method I found on Origami Spirit blog (http://www.origamispirit.com/2012/01/how-to-fold-plastic-bags-for-easy-storage-and-travel/#respond), and I put all the small bags in an empty Kleenex box.  I had seen this idea before but I can't really remember were.

Check out my before and after pictures.  What a difference!  and it took less than 30 minutes. 

BEFORE
AFTER
AFTER


September 20, 2012

Granola: The most original Hostess Gift

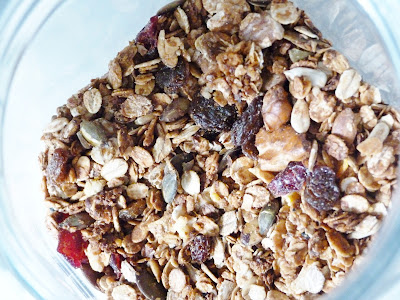
homemade granola

A couple of weeks ago we had some friends over for a visit.  It was nothing special just a weekend with friends we hadn't seen in a few months.   We were not expecting our guest to bring anything, but both couples actually did.  One of them brought a swing for the two kids, and the other a very interesting homemade granola. 

That morning when we called one of them to ask at what time they expected to arrive (they had a 2 hour journey), they told us that they were about to leave but they hadn't yet because they were waiting for our gift to "cool down".  We didn't think much of it except that maybe they were bringing some sort of cake or dessert.

Well, you can imagine our surprise when our hostess gift was giftwrapped and still a little warm.  It was also heavy and obviously inside some sort of jar.  I was so curious, and when I opened it, to my surprise, I saw granola on a simple but beautifully looking airtight canister that had a decorative tulip napkin on top.  Wow! that was a totally different, original, unexpected, and as we later realized, delicious hostess gift. 


So my homemade granola is about to be finished off as we have it for breakfast all the time but I can't go back to store bought granola anymore.  The homemade version was just too good, besides I really want to give it a go in trying to make my own.  I still have to search a few recipes, give it a few trials and adapted it to suit me and my family, but once I have it all figured out I'll post the recipe here.  I can't wait!

PS:  It will definetely be oatmeal based

September 17, 2012

Paint Car Tracks on Paper Roads

Paint car tracks on paper roads

Keeping my little boys entertained and motivated to try different things is one of my top priorities these days.  I have made a commitment to myself to expose them to creative play by introducing different materials and ideas that encourage them to imagine, dream, and play together.  I know they are still a little young to do all the above but my idea is to slowly build it up.

On Monday after searching for toddler play ideas I came across some different ways to play with paint....with cars!  Well I don't how that never occurred to me but once I saw it I thought to take it a step further and make a road out scrap paper to let the cars drive around.  This was really easy to do and it kept my boys entertained for about 30 minutes (which is a long time for a soon to be 3 year old and a 15 month old).

To make the road I took about 20 sheets of scrap paper.  I put them together with tape on the back. and then took it outside and, on the blank side, I drew lines with a black marker to make two lanes.  I then took 3 or 4 different paint colors in paper plates and placed them (with tape underneath) on different spots along the road.  I told the kids that the paint was gas and that the cars could stop at any of the gas stations to fill up while continuing on their way.  They loved it.

The best  part for me was that cleanup was so easy.  For the road and gas stations it was just a matter of picking it up and throwing it into the recycle bin.  For the cars cleanup I decided that the best was to take them to the car wash...basically I fill out my sink with soap and water and the kids and I gave the cars a good scrub.  Which preschooler doesn't enjoy playing with soap, bubbles and water? My oldest really enjoyed it, the little one felt like  doing something else.

September 04, 2012

Children's Cool Cardboard Car Wash

DIY children's cardboard carwash
My son loves to go through the car wash and thinks this is something everyone does every weekend.  He likes it so much that sometimes when we ask him what he wants to do for the day he will say:  "wash car".  For him the car wash is as good as going to the park.  That is why a few months ago we decided to build him an outside car wash for his toy cars.  Searching different options I found a really cool one on the Disney Family Fun website, but we never got around getting all the materials...and as it is already September we decided to wait until next spring and then give it another try.

Then last week Monday I set myself to let Nicholas enjoy the last week of school vacation as much as possible.  I had a few activities planned but still had some free space in the calendar so I thought probably the best ways to fill those gaps was to give him a new toy, but instead of buying one I would make him one.  I found this website, http://www.filthwizardry.com/2009/01/home-made-toy-carwash.html and use it as inspiration to make a cardboard car wash.  I used only things I had around the house and it took me about two hours to complete.

I started making it on the spot so there wasn't much planning ahead, the only thing I knew was that I wanted it to be interactive and only with materials I had in the house.    I decided to have 3 interactive stations to make it easy, manageable and playable (my son is not yet 3).  First station had two top spin wheels, the second station had two side spin wheels and the third station was the dryer.   For materials I was lucky enough to find a box on my recycling bin that had transparent sides and top which were perfect for the visibility of  the different stations and for the entrance and exit doors.  For the top spin wheels I used red cardboard and rolled it onto wood skewers, for the side spin wheels I used felt scraps and also rolled it onto wood skewers.  For the dryer I used colored serpentine and punched a few wholes on the box to blow air through and create serpentine movement.  I also decided to cover the box with serpentine to create a car wash feel on the box.  This last step was the longest. 

Needless to say, as soon as my son woke up from his nap, he started playing with the car wash giving his cars a good scrub ;0).  He loved it! and I was also really happy with the results.

Materials:
-rectangular box
-4 wood skewers
-serpentine
-colored cardboard paper
-felt scraps
-white glue

How to:
1. Start by cutting out the sides of the box to make entrance and exit areas for the cars


2. Cut 8 small 1x2 inch rectangles of cardboard paper
3. Cut fringes in each piece of cardboard paper and then roll 4 pieces onto one skewer one behind the other starting on the center and moving out.  Do the same with another skewer and fill it up with the remaining pieces of paper
4.  Wrap the felt scrap pieces onto the remaining two skewers.


5.  Cut serpentine in the size of the internal length and width of the box (taking into consideration that part of the serpentine will be pasted onto the top of the box).  The serpentine is supposed to be the hanging loose clothes used for drying the cars .  Paste this section onto the top end side of the box close to the exit side.


6.  Close to the Entrance side of the box, make two parallel holes going from top to bottom to fit the felt skewers.
7.  On the center of the box make two set of holes crossing the upper side of the box going from one side to the other.  This will be where the upper spin wheels will be located.


8.  Install all wheels in place.
9.  Cover the box with pretty paper, serpentine(in my case) or just add the words car wash to it.